Stop Wasting Water: How to Fix a Running Toilet Yourself
It was 2:00 AM, and the only sound in my apartment was that relentless, ghostly hissing coming from the bathroom. I was halfway through a deep-focus session, trying to organize my project boards, when that constant trickle of water started eating away at my sanity. Most people assume a noisy bathroom means you’re looking at a massive plumbing bill or a weekend-long DIY nightmare, but that’s a total myth. Usually, learning how to fix a running toilet isn’t about calling an expensive professional; it’s just about identifying one tiny, annoying part that’s lost its rhythm.
I’m not here to give you a lecture on complex hydraulics or suggest you buy a whole new porcelain throne. Instead, I want to show you how to tackle this with a minimalist approach. We’re going to walk through the most common culprits—from the flapper to the fill valve—using nothing more than a few basic tools and a bit of patience. My goal is to help you stop the noise, save some money on your water bill, and get your Tuesday back on track without the unnecessary stress.
Guide Overview
Tools & Supplies
- Adjustable wrench for tightening bolts
- Screwdriver for securing components
- Sponge or towel for absorbing excess water
- Replacement flapper (1 unit)
- Replacement fill valve (1 unit)
- Replacement toilet tank repair kit (1 kit)
Step-by-Step Instructions
- 1. First things first, grab your pocket notebook and jot down what you’re looking at. Pop the lid off the tank and take a quick look at the water level. If it’s spilling over the top of the overflow tube, your fill valve is likely the culprit. If the water level is low but you still hear that constant trickling, we’re probably looking at a leak from the tank into the bowl.
- 2. Check the flapper—that little rubber circle at the bottom of the tank. This is usually the main offender. Sometimes it just gets a bit of grit under it, or it’s gotten old and warped. Reach in (it’s just water, I promise) and feel the seal to see if it’s actually sitting flush against the drain hole. If it feels slimy or brittle, it’s time for a replacement.
- 3. If the flapper looks fine, inspect the chain that connects it to the handle lever. If that chain is too tight, it keeps the flapper slightly lifted; if it’s too long, it can get caught underneath the seal. You want just a tiny bit of slack so the flapper can drop down and do its job without any interference.
- 4. Next, let’s look at the float. This is the part that tells the water when to stop flowing. If it’s set too high, the water will just keep running into the overflow tube indefinitely. You can usually adjust this by turning a small screw on the fill valve or sliding the float clip up or down. It’s a small adjustment, but it can save you a ridiculous amount on your water bill.
- 5. If you’ve checked the flapper, the chain, and the float and you still hear that ghostly running sound, the fill valve itself might be dying. These are pretty cheap and surprisingly easy to swap out. Just turn off the water supply valve behind the toilet, drain the tank, unscrew the old valve, and drop in a new one. It’s a bit more hands-on, but it’s a solid win for your Tuesday.
- 6. Once you think you’ve nailed the fix, turn the water back on and wait a few minutes. Watch the tank fill up and listen closely. You’re looking for that moment where the water hits the right level and the sound of rushing water just… stops. If it stays quiet, you’ve officially reclaimed your peace of mind.
Mastering Silent Toilet Leak Detection for a Calmer Home

Sometimes, the most annoying problems are the ones you can’t actually hear. You might not have a constant roar of running water, but if you notice your water bill creeping up or your toilet seems to “refill” itself every twenty minutes for no reason, you’re dealing with a phantom leak. I used to ignore this, thinking it was just part of living in an old apartment, but it’s actually just a tiny disruption to your peace. One of the easiest ways to perform silent toilet leak detection is the old food coloring trick: drop a few drops of dye into the tank, wait fifteen minutes without flushing, and see if the color seeps into the bowl. If it does, you’ve found your culprit.
Usually, these quiet leaks boil down to a few specific culprits. Most of the time, it’s a simple matter of toilet flapper replacement because the rubber has just gotten old and brittle. If the dye test doesn’t reveal a faulty flapper, you might need to look into flush valve troubleshooting to see if the seal is sitting unevenly. It’s rarely a catastrophic failure; it’s usually just one small part that needs a little attention to get your home feeling steady again.
Toilet Tank Components Explained Without the Overwhelming Jargon
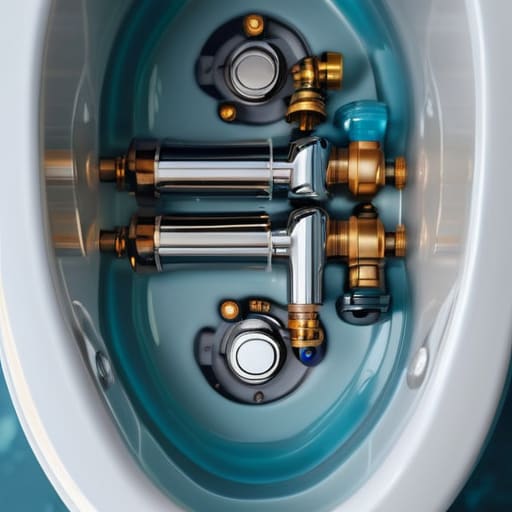
Look, I get it. You lift the lid, look down into the tank, and it feels like you’re staring into the guts of a machine you weren’t meant to understand. It’s intimidating. But honestly? Most of what’s going on in there is pretty straightforward once you strip away the plumbing terminology. Think of it like a mechanical keyboard—there are just a few moving parts that need to be in sync to work right.
The most common culprit is usually the flapper. If you’re looking at a piece of rubber that seems worn down or slimy, you’re likely looking at a simple toilet flapper replacement task. This little guy is responsible for sealing the hole at the bottom, and if it doesn’t seat perfectly, water just keeps escaping. Then you’ve got the fill valve, which is basically the gatekeeper for your water supply. If your tank is constantly refilling or making weird noises, a quick toilet fill valve adjustment can usually settle things down without needing a professional.
The goal isn’t to become a master plumber; it’s just to understand how the water level in the toilet tank interacts with these parts. When everything is calibrated correctly, the tank fills to the right height, the valve shuts off, and the flapper seals tight. It’s all about that balance.
Five quick wins to stop the ghost flushing
- Check the flapper first; it’s usually just a piece of rubber that’s gotten a bit warped or covered in mineral buildup, and a quick cleaning (or a $5 replacement) solves 90% of these issues.
- Don’t let the chain get too tight; if there’s no slack, it can pull the flapper slightly open, causing that constant, annoying trickle that drains your sanity and your water bill.
- Adjust your fill valve height so the water level sits about an inch below the overflow tube; if it’s too high, you’re basically paying to let water run down the drain all day.
- Give the float a gentle nudge; sometimes they just get stuck in a weird position due to some debris, and a little manual reset is all it takes to get things back to normal.
- Keep a small kit of “essentials” on hand—a new flapper, a replacement chain, and some plumber’s tape—so when a leak happens on a random Tuesday, you aren’t stuck hunting for parts mid-crisis.
The TL;DR for a quiet, efficient bathroom
Most running toilets aren’t a sign of a plumbing disaster; they’re usually just a loose flapper or a misaligned chain that you can fix in ten minutes.
Don’t wait for a massive water bill to take action—learning to listen for those tiny, silent leaks is the easiest way to keep your space (and your budget) under control.
You don’t need to be a master plumber to handle this; once you understand the basic parts in the tank, it’s just a simple game of trial and error.
Getting Your Tuesday Back on Track
At the end of the day, fixing a running toilet isn’t about becoming a master plumber; it’s just about identifying whether you’re dealing with a faulty flapper, a misaligned chain, or a worn-out fill valve. We’ve walked through the anatomy of the tank, learned how to listen for those sneaky silent leaks, and broken down the actual repair steps so you aren’t staring at a mess of hardware feeling totally lost. Once you swap out that old, crusty rubber or adjust the float, you’ve effectively eliminated a constant source of micro-stress from your home environment. It’s a small win, but it’s one that keeps your water bill down and your mental space clear.
I know that when things start breaking, it’s easy to feel like the universe is just piling on the chaos. But there is something weirdly grounding about taking a mechanical problem, breaking it down into its smallest parts, and actually fixing it with your own hands. It’s a reminder that most of the things overwhelming us don’t require a massive, expensive overhaul—they just need a little bit of focused attention and a steady hand. So, take a breath, grab your wrench, and remember that you’ve got this. You aren’t just fixing a toilet; you’re reclaiming your peace of mind, one small task at a time.