How to Build Floating Shelves That Are Actually Heavy-duty
I was staring at a pile of mismatched books and a half-empty succulent on my floor last Tuesday, feeling like my apartment was slowly closing in on me. I knew I needed more storage, but the thought of a massive home renovation felt completely overwhelming. Most people tell you that floating shelves diy projects require a workshop full of heavy-duty power tools and a degree in carpentry, but honestly? That’s a total myth. I realized that I didn’t need a Pinterest-perfect studio; I just needed a way to get some functional vertical space without losing my mind or my entire weekend.
In this guide, I’m stripping away the intimidating jargon and the “perfect” aesthetic fluff to show you how it’s actually done. We’re going to walk through the realistic steps of a floating shelves diy project, focusing on the tools you actually need and the mistakes I made so you don’t have to. My goal isn’t to help you build a museum; it’s to help you find a simple, steady way to organize your chaos, one sturdy shelf at a time.
Guide Overview
Tools & Supplies
- Drill/Driver for mounting brackets
- Level to ensure even installation
- Stud finder to locate wall supports
- Saw for cutting wood to length
- Measuring tape for precision
- Wood boards (shelves) 1-2 units
- Floating shelf brackets/hardware 1 set
- Wood screws 1 pack
- Sandpaper 1 pack
Step-by-Step Instructions
- 1. First things first, you need to grab your supplies. I know, it sounds tedious, but having everything on the table prevents that mid-project spiral where you realize you’re missing a screw and have to head back to the hardware store. You’ll need your wood (I personally love a nice reclaimed pine), some floating shelf brackets, a drill, a level, and a pencil. Honestly, just make sure you have a sturdy drill because if you’re working with thicker wood, you don’t want to be fighting the hardware halfway through.
- 2. Now, let’s talk about the “where.” Before you even touch a drill to the wall, find your spot. Use your level to make sure you aren’t accidentally installing a slanted shelf that makes your decor look like it’s sliding off. I usually grab my physical pocket notebook to sketch out a quick rough draft of where the shelves will sit in relation to my other furniture. It helps me visualize the space so I don’t end up with a shelf that feels totally disconnected from the room.
- 3. Once you’ve marked your spots, it’s time to find the studs. This is the part where most people mess up, and trust me, you do not want your shelf—and all your heavy books—crashing down on a Tuesday night. Use a stud finder to locate the wooden beams behind your drywall. If you can’t hit a stud exactly where you want the shelf, you’ll need to invest in some heavy-duty drywall anchors, but hitting a stud is always the gold standard for stability.
- 4. Time to drill. Using your pencil marks as a guide, drill your pilot holes through the wall and into the studs (or your anchors). Don’t go too crazy with the speed; just keep it steady and controlled. I like to think of this as the foundation of the project. If the holes are clean and straight, everything else will fall into place much more smoothly.
- 5. Now, we attach the brackets. Line up your floating shelf hardware with the holes you just drilled and start driving in the screws. This is one of those repetitive tasks that I actually find kind of therapeutic—there’s something very satisfying about the rhythmic sound of a drill tightening a screw perfectly into place. Just make sure the bracket is flush against the wall and doesn’t wiggle.
- 6. The final stretch: sliding the wood onto the brackets. Most floating shelf kits are designed to just slide right over the metal supports. Carefully guide your wood piece onto the hardware. Once it’s seated, give it a gentle tug to make sure it’s secure. If it feels a little loose, you might need to add a tiny bit of wood glue or some felt pads to the bracket to create a snug, perfect fit.
- 7. Finally, the fun part—styling. Don’t feel pressured to make it look like a professional showroom immediately. Start with one or two items you actually love, maybe a small plant or a couple of books, and just see how it feels. The goal isn’t perfection; it’s just about creating a little corner of order in your space that makes you feel at home.
Mastering Modern Rustic Shelf Design Without the Overwhelm
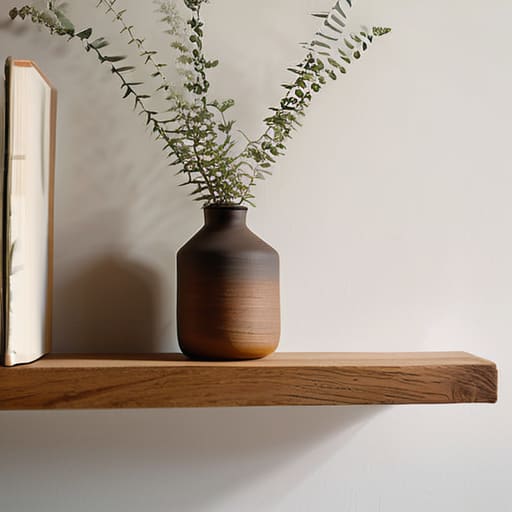
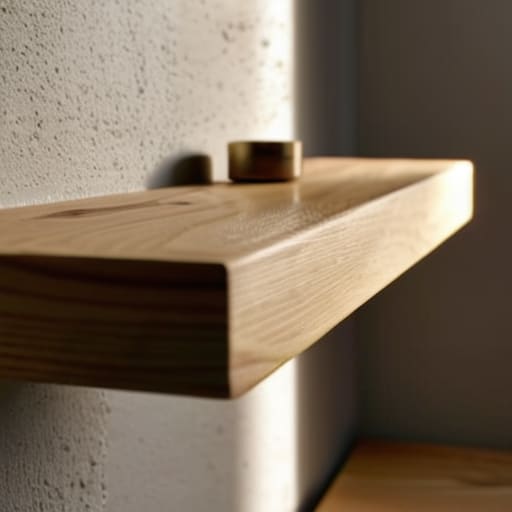
When you’re aiming for that modern rustic shelf design, it’s easy to get caught up in trying to make everything look perfectly weathered or reclaimed. Honestly? That’s how you end up with a shelf that looks more like a piece of driftwood than something functional. My advice is to keep the wood texture organic but the lines clean. If you’re working with reclaimed timber, just make sure you’ve sanded down the rough bits enough so they don’t snag your favorite sweater. The goal is to create a vibe that feels intentional, not like you just found a plank in an alleyway.
The real secret to pulling this off without it looking cluttered is all about the hardware. I’m a huge fan of using hidden shelf brackets because they keep the focus entirely on the wood grain rather than the mechanics of the build. It gives you that “floating” magic that makes a small space feel way more open. Just a quick heads-up: before you get too attached to your decor layout, definitely look into some shelf weight capacity tips. There is nothing more soul-crushing than spending a Saturday afternoon on a project only to have your collection of ceramic mugs come crashing down on Tuesday morning.
Essential Woodworking Tools for Shelving and Hidden Shelf Brackets
Look, I’m not going to pretend you need a professional-grade workshop to pull this off, but having the right woodworking tools for shelving makes the difference between a shelf that looks intentional and one that looks like a weekend mistake. If you’re working with solid wood, a decent miter saw is your best friend for those clean, crisp edges. But honestly? Even a simple hand saw and a level can get you through it if you’re patient. I always keep my physical notebook handy when I’m measuring twice, because let me tell you, measuring once and hoping for the best is a recipe for a very expensive piece of scrap wood.
The real magic—and the part that usually trips people up—is the hardware. If you want that seamless look, you’ll need to get comfortable with hidden shelf brackets. These are what give you that “floating” illusion, but they require precision. When you’re prepping the wood, make sure your drill bits are sharp enough to create clean holes for the rods to slide into. Also, a quick heads-up: if you’re mounting these on anything other than studs, please don’t skip the heavy-duty anchors. Knowing your shelf weight capacity tips before you start decorating is the only way to ensure your favorite books don’t end up on the floor by Wednesday.
Five Little Things That Save Your Sanity (and Your Walls)
- Check your studs twice, drill once. I’ve learned the hard way that relying on drywall anchors alone for a shelf full of books is a recipe for a very messy Tuesday. If you can’t hit a stud, invest in some high-quality heavy-duty anchors—don’t wing it.
- Don’t aim for perfection; aim for level. You’ll be staring at that shelf every day, and if it’s even slightly tilted, it’ll drive you crazy. Use a real spirit level, not just a “close enough” eye test, because your brain will definitely notice the slant.
- Keep your decor “breathable.” It’s tempting to cram every single trinket you own onto your new shelf, but that just creates visual noise. Leave some empty space so the wood grain can actually breathe and the whole setup feels intentional rather than cluttered.
- Sanding is your best friend. If you’re using reclaimed wood or even just cheap pine, spend that extra twenty minutes with some fine-grit sandpaper. It makes the difference between a shelf that feels “DIY-ish” and one that feels like a piece of actual furniture.
- Plan for the weight before you buy the wood. If you’re planning on displaying heavy ceramic mugs or a massive collection of hardcovers, you need thicker, sturdier timber. There’s nothing more frustrating than finishing a beautiful project only to have it sag under its own weight two weeks later.
The Low-Stress Summary
Don’t sweat the perfection; even a slightly uneven shelf adds character to a room, so focus on getting it secure rather than getting it flawless.
Invest in the right hardware early—using decent hidden brackets saves you from the headache of a shelf that sags two weeks after you hang it.
Start small with one single shelf to test your rhythm before you commit to an entire gallery wall or a full room overhaul.
Small Wins, Big Impact
At the end of the day, building these shelves isn’t about achieving some unattainable level of interior design perfection. It’s about the process—getting the right tools, finding those hidden brackets, and finally seeing something you built with your own hands actually holding your favorite books or plants. We’ve covered everything from the essential woodworking gear to finding that perfect modern rustic vibe, but the most important part is just showing up for the project. Even if your measurements are a little off or the wood grain isn’t perfectly symmetrical, you’ve successfully turned a blank wall into something functional. That is a massive win for any Tuesday.
I know how it feels when a DIY project seems like just one more thing on an already overflowing to-do list. But there is something incredibly grounding about working with your hands and seeing a tangible result. Don’t let the fear of a messy workspace or a complicated instruction manual stop you from starting. You don’t need to renovate your entire apartment to feel like you’re in control of your space; you just need to start small. Once that first shelf is up and looking solid, you’ll realize that managing your environment is a lot like managing your life—it’s just a series of small, intentional steps that eventually add up to something beautiful.